Potato vs Grapefruit: Which makes the best battery?
Potato vs Grapefruit: Which makes the best battery?
In the golden age of science fairs and the early days of ultra-low power microcontrollers, a go-to demo was powering a device using a lemon as a makeshift battery.
However, since those heady days of lemon light, the world of ultra-low-power design has matured significantly. Today’s embedded devices are expected to last for years on coin cells or even run completely on harvested energy, drawing just microamps from the environment. We’re talking ambient IoT, where every nanoamp counts, and where success relies on far more than just picking the right microcontroller. It depends on understanding the energy flow across the entire system.
Nerdy curiosity struck – we had to try the lemon trick again. Now with Otii, we can measure every bit of energy flow and emulate a battery to check if it powers an IoT device.
But this time, we didn’t stop at just a fruit – we threw a vegetable into the mix, too. That’s how we landed on a juicier question:
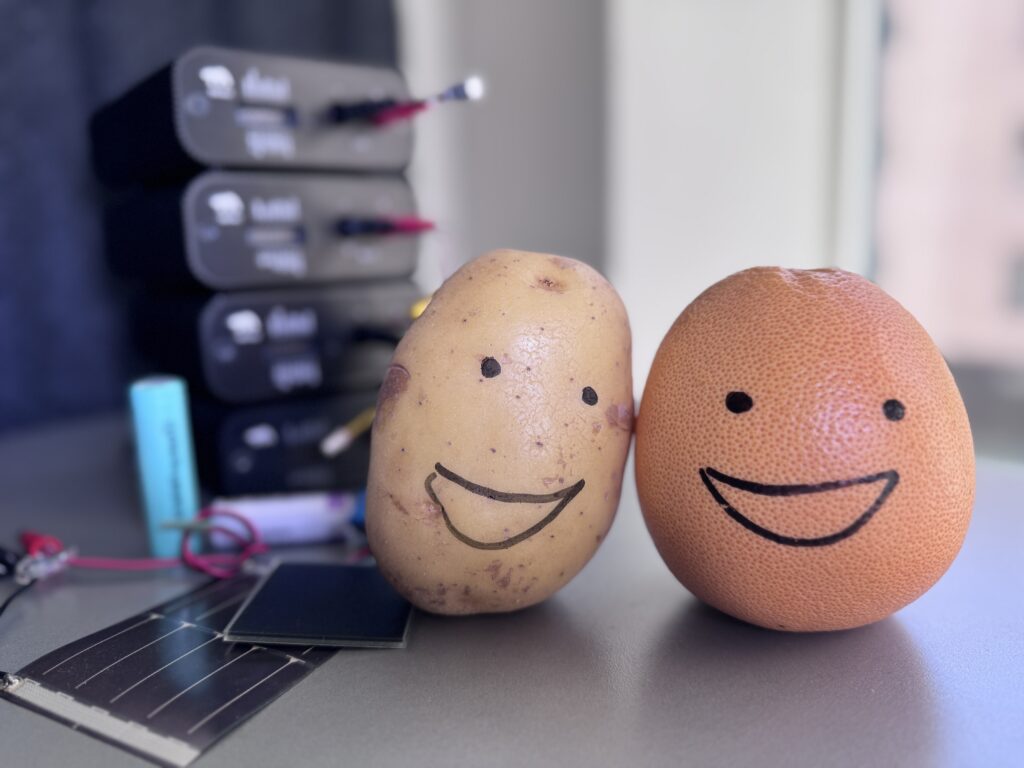
Which makes the best battery: a grapefruit or a potato?
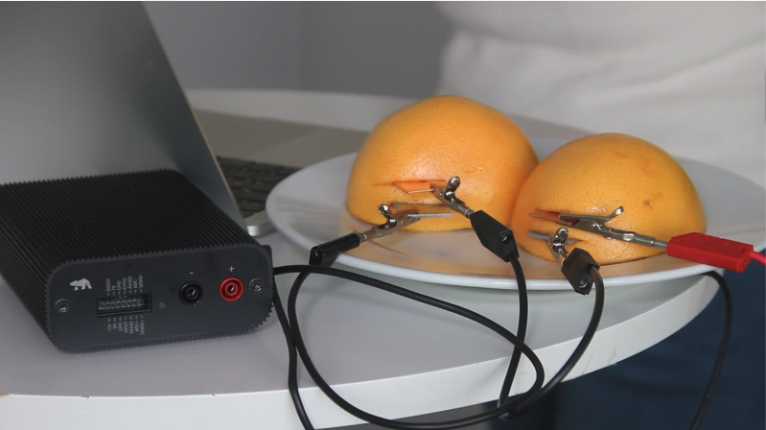
The setup: two tasty batteries plus Otii Arc Pro
Our goal was simple: to recreate the fruit battery experiment, but treat it like a real-world power source, worthy of profiling, modeling, and system-level validation. That meant:
- A 2-cell grapefruit battery
- A 2-cell potato battery
- Profiling and validation with Otii Arc Pro and Otii Battery Toolbox
Each cell was composed of:
- A copper electrode plate (cathode)
- A zinc electrode plate (anode)
- Electrolyte: the juicy acid interior of the fruit or vegetable

We used two cells to increase the voltage slightly, aiming for a level comparable to that of a regular alkaline battery. With approximately 10 mm between the electrode plates, we wired the two cells in series and obtained an Open Circuit Voltage (OCV) of around 1.5V.
Electrons, electrodes, and electrolytes
Let’s talk a bit about what’s actually happening inside these unconventional batteries.
We’re using a copper electrode (the positive terminal) and a zinc electrode (the negative terminal). The magic happens through a redox reaction:
- At the zinc side, zinc atoms transfer electrons and become zinc ions (Zn²⁺), a process known as oxidation.
- Those free electrons travel through the external circuit (i.e., your wires and load) to the copper side, where they meet hydrogen ions (H⁺) in the acidic juice and reduce them into hydrogen gas (H₂), a process known as reduction.
If you were to weigh the electrodes after a long discharge, you’d notice that the zinc electrode has lost some mass (as Zn dissolves into Zn²⁺), while the copper electrode remains unchanged. The electrons flow from zinc to copper, which is what provides usable electrical power to your device.
Now, what determines the voltage of our battery?
It’s not the size of the electrodes or the distance between them. The voltage is defined entirely by the electrochemical potential difference between zinc and copper in the given electrolyte. So, if you changed the electrode materials, say by swapping copper for silver, you would get a different voltage.
What is affected by size and spacing is the power output, or more precisely, how much current the battery can supply. Bigger electrodes mean more surface area for the reactions, and smaller distances mean less internal resistance. That said, we kept a roughly 10 mm spacing between plates in both batteries to ensure fairness (although it’s not perfect).
And yes, juiciness matters. More liquid means better ion mobility and lower internal resistance. A dry potato makes a worse battery than a juicy grapefruit, plain and simple.
As for shelf life? Once you’ve jabbed metal plates into a piece of fruit or a tuber, the clock is ticking. These “batteries” won’t last long before the internal chemistry breaks down or the whole thing starts to rot. Not ideal for production… but perfect for proving a point.
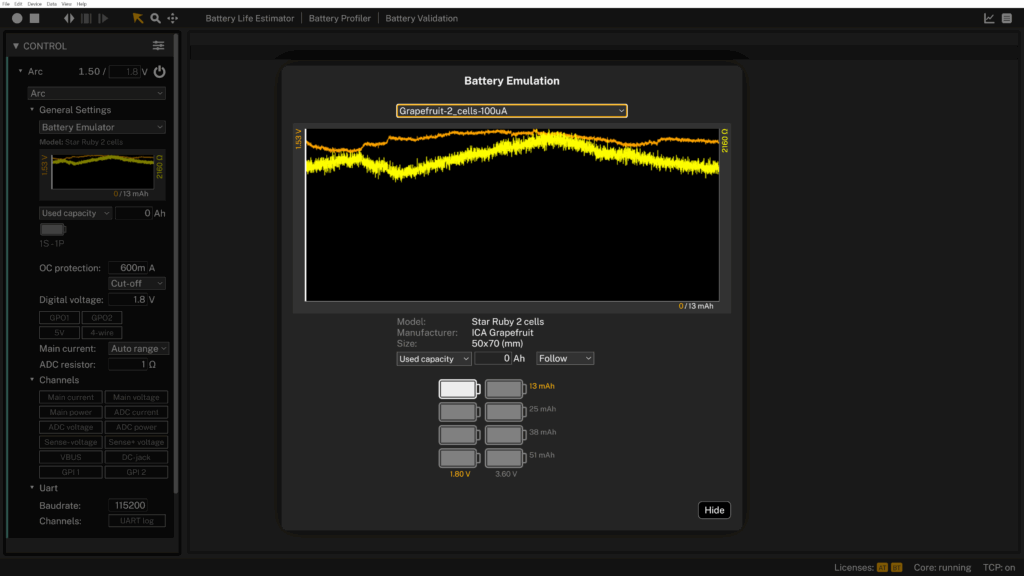
Profiling the batteries with Otii
To understand how much usable energy we could actually extract from our homemade batteries, we used the Otii Battery Toolbox to create a controlled discharge profile. Since these unconventional batteries are naturally inefficient and have high internal resistance, we had to go easy on the load.
Discharge profile defined for both battery types, the fruity and veggie ones:
- 100 µA for 30 seconds
- 200 µA for 30 seconds
This profile provides an average discharge current of 150 µA, which is typical for ultra-low-power embedded systems. It also gives us a decent internal resistance resolution of around 10 ohms, which seems like a good setting, as we expect a very high internal resistance.
We set the nominal voltage to 1.8 volts, but this value is informational only. Otii automatically measures and records the actual voltage at the beginning of the test, so the nominal voltage field does not affect the profiling behavior. We also defined a minimum open-circuit voltage (Min OCV) of 0.6 volts. In this case, it aligns with the cutoff voltage value. If the cutoff and Min OCV values are the same, it will always stop due to the cutoff, as this is the voltage during load. In some cases, you may want to have separate exit conditions during load, such as when dealing with rechargeable batteries.
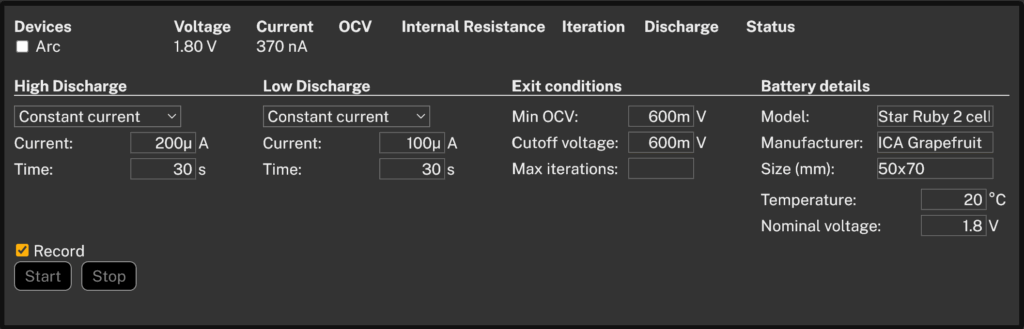
Finally, we filled in some basic details about the battery, such as its name, nominal voltage, and temperature. These fields do not influence the profiling process but are helpful for documentation and traceability, especially when comparing results or using the profiles later in emulation.
Profiling results: Grapefruit vs. Potato
With the battery profiling setup ready, it was time to see how our unconventional power sources actually performed. We ran the same low‑current discharge profile on each and compared their stability, capacity, and internal resistance.
Grapefruit: the juicy champion
The grapefruit delivered a stable discharge profile and an energy capacity of 12.73 mAh. Actually, the grapefruit continued to provide power, but it started to smell.
The internal resistance hovered around 2.1 kΩ, which is relatively high but not unusual for biological electrolytes. This means the grapefruit can handle low and steady current draws, but would collapse under a spiky load like a radio burst.
Potato: a low performer with a hot comeback!
Our first test with a raw potato barely lasted 8 minutes, delivering just 15.21 µAh. Not milli, micro.
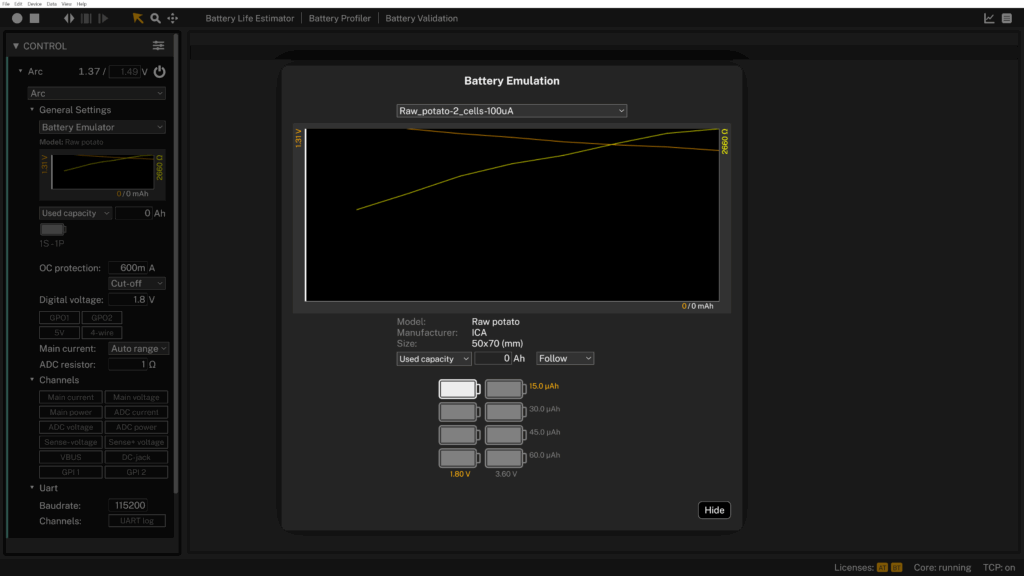
The internal resistance spiked above 2.6 kΩ, and the voltage dropped almost immediately under load. As a power source, the raw potato could not sustain the discharge profile. Still, we had heard the rumors. Supposedly, a boiled potato performs better. So naturally, we had to test it.
We cooked a similarly sized potato in the microwave for 5 minutes, because that’s what proper engineering sometimes requires, and repeated the same profiling procedure.
The result? 4.89 mAh.
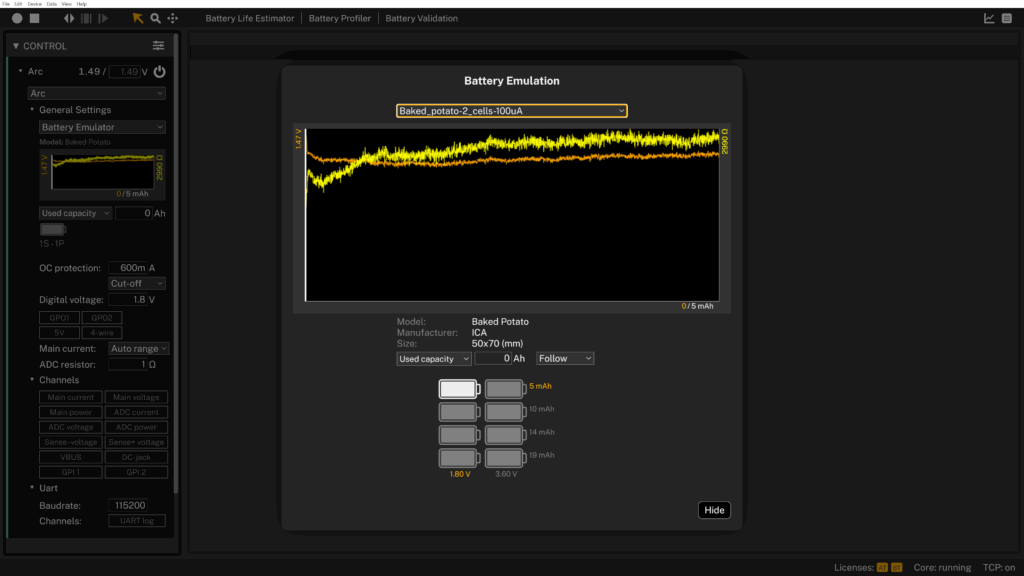
It turns out that the heat treatment gelatinizes the starches, improving conductivity by freeing up ion pathways within the potato. The difference was huge, a 300× improvement over the raw version.
The discharge curve was far more stable, internal resistance dropped slightly, and for the first time, the potato behaved like a usable energy source. Not long-term, of course. But real, measurable, and surprisingly consistent.
Powering an IoT device… Is it actually possible?
Short answer: yes, but only for very specific ones.
Most connected devices, even those with ultra-low power, exhibit millisecond-range current spikes in the mA range. Such a peak causes catastrophic voltage collapse in a fruit battery with an internal resistance of 2 kΩ. But if your device has:
- No big spikes
- Gentle wake-up cycles
- Deep sleep with low average draw
- A lot of input capacitance
…then it just might work, at least for a few hours. More importantly, this experiment prompts us to consider the system holistically. This isn’t about powering a city with citrus; it’s about understanding how energy sources behave under real conditions and using that to design systems that are efficient, realistic, and validated.
What we learned (and why it matters)
This wasn’t just a fun experiment. It was a lesson in what system-level design really means. You’re not just designing a board. You’re designing a system:
- One that harvests, stores, and delivers power
- One that reacts to energy availability
- One that must balance performance, reliability, and lifetime
Whether you’re working with fruit, solar cells, or hybrid super capacitors, the lesson is the same: you can’t design efficient and reliable low-power systems unless you measure, model, and validate the entire energy flow.
From lemons to a low-power mindset
This experiment reminds us that even the simplest setups can reveal the complexities of modern low-power embedded design. So whether you’re working on the next self-powered sensor node, or just eyeing that sad potato in your kitchen… remember: great engineers don’t just design for power, they design with a low-power mindset.
Want to try it yourself?
- Grab your Otii Arc / Ace Pro
- Download the fruity and veggie battery profiles
- Challenge your device by emulating the battery profiles
And if your device boots on a grapefruit or baked potato, tag us, seriously!
Want to validate actual batteries? Try Battery Validation.
Looking to test light energy harvesting? Discover our IoT solar devices evaluation series.