GPIO examples for power measurements on the Otii Arc and Otii Ace
GPIO examples for power measurements on the Otii Arc and Otii Ace
One frequently asked question concerns the expansion port on the Otii Arc and Otii Ace, specifically the GPIO pins and how they can be used for power measurement. We thought we’d give you a few examples of their use!
Control the start/stop of the power measurements with GPIOs
A typical use case would be to control the start and stop of the power consumption recordings by a trigger from a device under test (DUT).
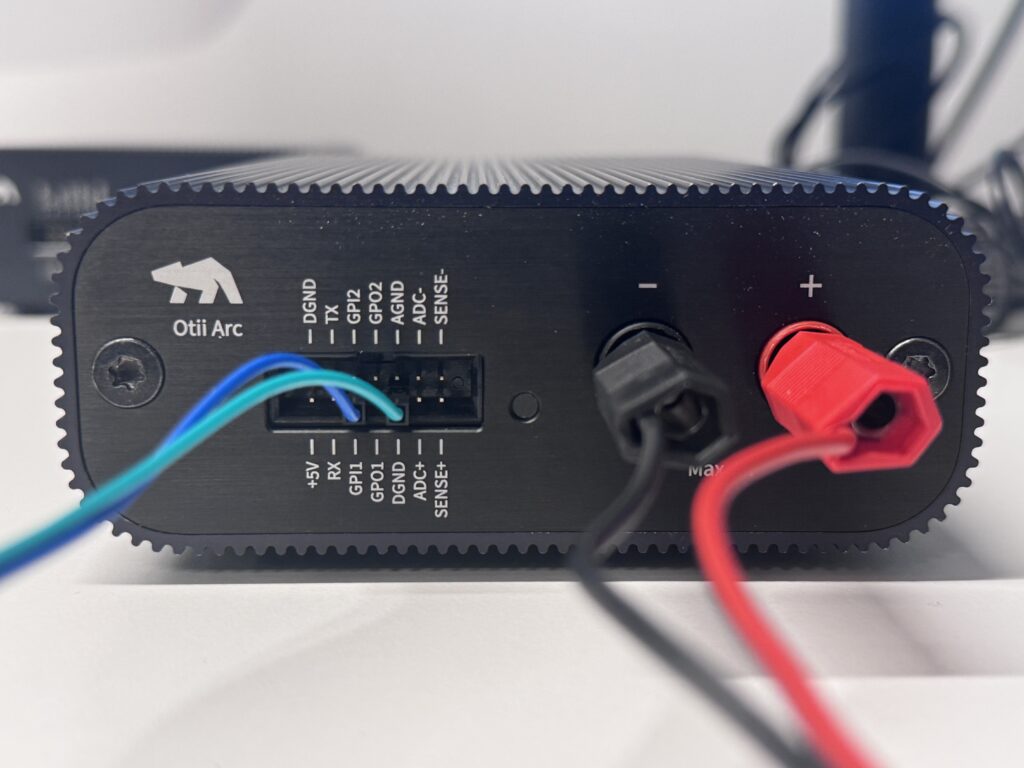
For that case, connect the DUT’s GPIO output to GPI1 and ground it to DGND, in the expansion port of the Otii Arc/Ace, as shown in Fig. 1. Connect the USB cable from the PC to the Otii Arc/Ace, and power cables from it to the DUT.
The GPI status query can be performed from a Python script. Down below, you can find a Python script that demonstrates this. To run the script, you should first ensure you have reserved an Otii Automation Toolbox license and that Python is installed. Then run the script in a terminal window by entering <python3 gpi_example.py>.
When it starts, the Python script configures the Otii Arc/Ace and prints a short header. Main voltage, maximal current, enabled channels, and other necessary settings are specified in the script. It’s always a good idea to check these before starting.
After printing the header, the script powers on the DUT and enters a loop to wait for GPI1 to go high. When the GPI pulse is detected, the recording is started, and the script enters another loop to wait for the second pulse to stop the recording. This is what the main part of the script looks like:
#!/usr/bin/env python3

from otii_tcp_client import otii_client
import time

def wait_for_gpi(device, gpi):
    print(f"Waiting for GPI{gpi} trigger")
    while not device.get_gpi(gpi):
        pass

def trigger_recording(project, device):
    device.set_main(True)
    wait_for_gpi(device, 1)
    project.start_recording()
    print("Recording...")
    time.sleep(1)
    wait_for_gpi(device, 1)
    device.set_main(False)
    project.stop_recording()
    print("Stopped recording")

def main():
    client = otii_client.OtiiClient()
    with client.connect() as otii:
        device = otii.get_devices()[0]
        for channel in ['mc', 'mv', 'mp', 'i1']:
            device.enable_channel(channel, True)
        project = otii.get_active_project()
        trigger_recording(project, device)

if __name__ == '__main__':
    main()
Get alerts from your power measurements through GPIOs
To make it more interesting, let’s say we want to control an external device – a buzzer that warns us when the measurement begins and when it ends. A Python script is provided below and demonstrates how to configure the GPO output voltage and enable the GPO pin toggle to control the buzzer.
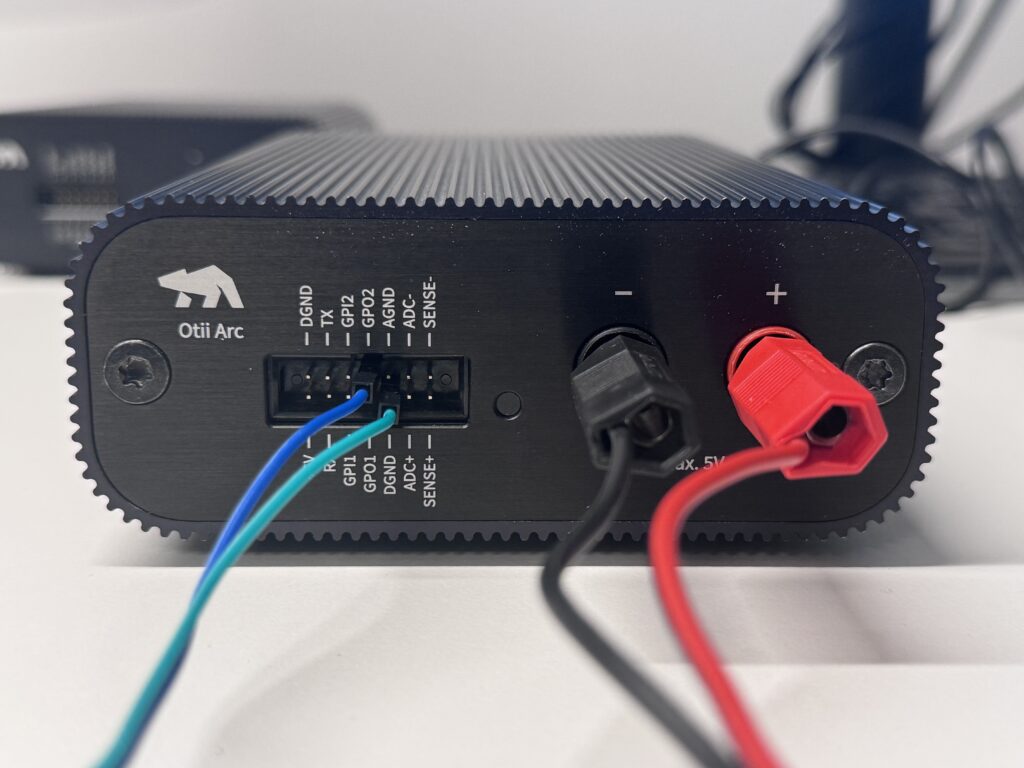
Connect the buzzer to GPO2 and ground it at DGND, as in Fig. 2.
Run the script in a terminal window by entering <python3 gpo_example.py>.
The script runs similarly to the previous example, but the central part is different. After printing the header, the system generates a short pulse on GPO2 to activate the buzzer. The recording starts, and the main power switches on. After a short wait, the script turns off the main power, stops recording, and beeps again. The main loop looks like this:
#!/usr/bin/env python3

from otii_tcp_client import otii_client
import time

def beep(device, gpo):
    device.set_gpo(gpo, True)
    time.sleep(0.5)
    device.set_gpo(gpo, False)

def record_with_beep(project, device):
    beep(device, 2)
    device.set_main(True)
    project.start_recording()
    print("Recording...")
    time.sleep(60)
    device.set_main(False)
    project.stop_recording()
    print("Stopped recording")
    beep(device, 2)

def main():
    client = otii_client.OtiiClient()
    with client.connect() as otii:
        device = otii.get_devices()[0]
        for channel in ['mc', 'mv', 'mp']:
            device.enable_channel(channel, True)
        project = otii.get_active_project()
        record_with_beep(project, device)

if __name__ == '__main__':
    main()
Exploring GPIO capabilities on Otii Arc and Ace
How will you use the GPIOs? Before starting, consult the Arc and Ace technical specifications, and ensure you do not overload GPO outputs. Use a relay or low-power semiconductor switch if your external device consumes too much power.
The scripts provided here can serve as a base for your own modifications. Find additional information on Python scripting with Otii here.
The expansion port GPIOs are great for power measurements, but also allow Otii to function as a logic analyzer. Here is how to set it up on your desktop.